7 tips for using Figma Make credits more efficiently


While everyone’s talking about “tokenmaxxing,” we’ve compiled seven best practices to help you build smarter—without prompting more—in Figma Make.
Share 7 tips for using Figma Make credits more efficiently
Since we launched Figma Make a year ago Here, we share our team’s favorite prompts, pro tips, and best practices for using Figma Make to help you get the most out of our recently launched prompt-to-code feature.

8 essential tips for using Figma Make
These seven tips can help you do the same in Make.
1. Make your first prompt do the heavy lifting
Your first prompt sets your project’s structure and establishes its constraints. The more complete that starting point is, the less time you’ll spend fixing it later.
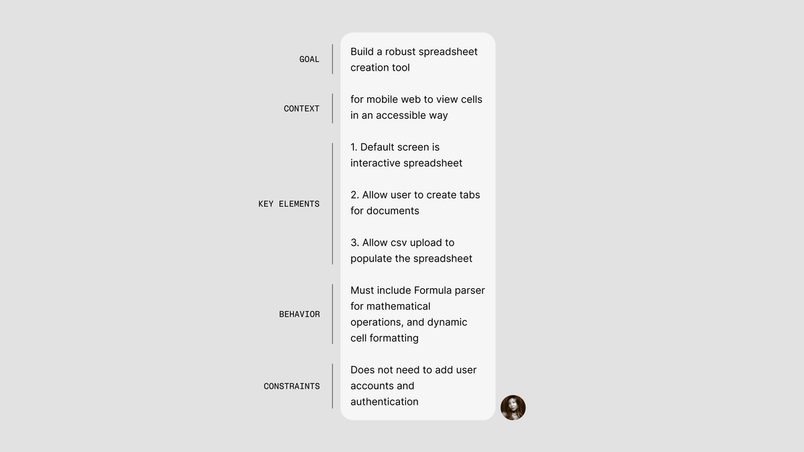
A useful rule of thumb: Treat the initial prompt as the brief, and every follow-up as a delta. This means your first prompt should include:
- The goal
- The context
- All key elements, behaviors and constraints
- What "done" will eventually look like
Figma Make tip
Ensure your first prompt is as intentional and complete as possible, then keep the rest of the conversation focused.
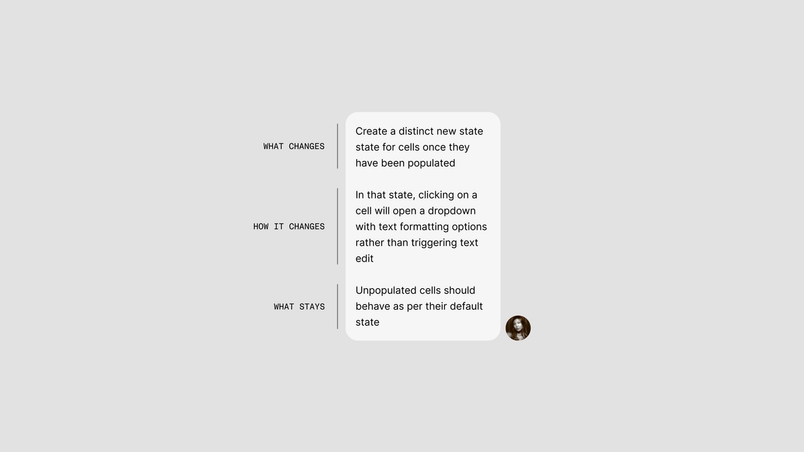
Once you have a good base to build on, your follow-up prompts can get much smaller. Good ones typically cover three things:
- What should change
- How it will change
- What should stay the same
For larger builds, consider breaking your work into stages. Get your project’s structure right first, without worrying too much about content details—structure is often the hardest thing to change once you’re deep into a build. Add intelligence and behaviors next, then refine the content and polish after that.
Avoid combining multiple changes in a single follow-up prompt, unless they are related fixes on the same piece of logic or UI. If three edits all affect the same component, then it’s more efficient to bundle them in one request than spend multiple rounds on the same thing.
Any follow-up prompt works better if it’s tightly scoped. The more specific you can be in what you want Make to change, the more efficient you’ll be. For example, “Update the calendar component,” “Add a new state to this screen,” or even “Edit the tokens.ts file” all direct Make more clearly than “That’s not right, can you redo it?”. The specific prompts tell Make exactly where to look and what to do. The vague prompts require Make to interpret your intention before guessing how to best achieve it, adding extra cost.


2. Prioritize manual edits for select changes
The teams getting the most out of Make also know when to stop prompting and start editing directly. For small visual changes—tweaking spacing, removing an element, adjusting text—the Edit tool is often the quickest move. It lets you make targeted adjustments without reopening the whole problem. That matters because many follow-up prompts aren’t actually asking Make to solve a new design problem; they’re asking it to nudge something that’s already basically correct.
Figma Make tip
Use the ⌘F shortcut to scan through code and find a specific tag or the data feeding content into your project. A good place to start is App.tsx—if it's not there, check the other .tsx files in the component folder.
The same is true in code. Some of the most efficient changes in Make happen when you jump to the source and edit the relevant value directly. This is especially useful when something is dynamic and not editable from the preview alone. For example, if you need to update text inside a repeated component, or change data pulled from a list in the same folder. Instead of prompting your way toward the right output, you can use Go to source, search the code, and make the change directly where it lives.
You don’t need to be a developer to benefit from this. Make’s code is readable enough that you can locate what you need, especially when you already know which element or behavior you’re trying to adjust.
For larger visual changes, we recommend using the Figma Design canvas. With Copy design Now you can copy any design from a Figma Make preview to the design canvas, allowing you to edit, iterate, and take your ideas further.Bringing Figma Make to the canvas
The point is to reserve prompts for the work they’re best at: generation, reasoning, and larger transformations—and opt for manual edits when the work gets more visual.
3. Turn repeated prompts into rules and workflows
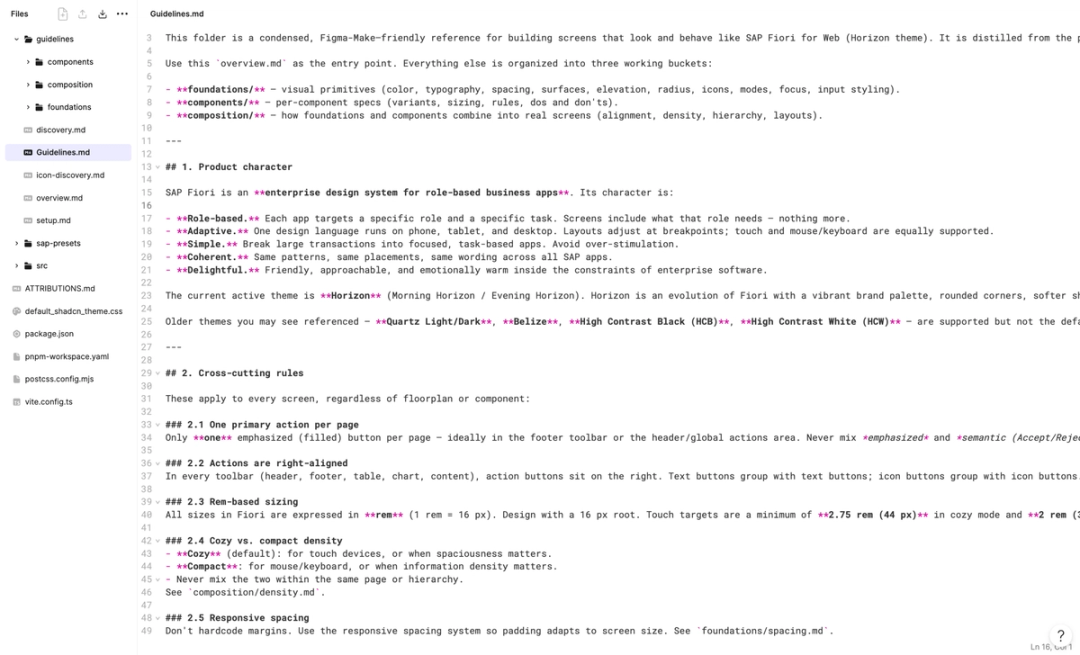
If you find yourself repeating the same instructions, it’s time to pull them out of the prompt. This is where markdown files like guidelines.md become valuable. The teams that get the most out of AI in their workflow systematically treat these as project requirements, not nice-to-haves.
Figma Make tip
Ask the model to critique your markdown files based on how it uses them. It can often spot redundancy, inconsistent naming, or vague instructions.
A good guidelines.md file lists the rules you want Make to follow throughout your project:
- What is in the design system
- What naming conventions to follow
- What patterns to prefer
- What quality bar to aim for
- Where to find the right source of truth for common decisions
Think of it as reusable project memory: a place to keep the rules and references Make should carry at all times. Since it isn’t relearning every time, the payoff is twofold: less repetition in your prompts and better first results.
Structure matters here. A single massive markdown file isn’t always the best answer. In many cases, it’s cleaner to have one primary guidelines file and smaller supporting .md files for more specific topics, like components, motion, tokens, or content patterns. The more readable these files are for the model, the more useful they become. Clear section headings, consistent labels, semantic naming, and less redundancy all help.

Skills.md files are the next step when the thing you keep repeating is not just context, but an entire workflow. Guidelines.md and skills.md can be easy to confuse because they’re both markdown files—at their core, they’re plain text instructions that help Make deliver more reliable outputs. The difference is the role they play:
- Guidelines: Always-on, ambient project memory that a Make project carries in the background
- Skills: On demand workflows you invoke when a specific task calls for them
If guidelines tell Make what to know, AI skills tell Make what to do. A skill works like a manual for a recurring task: reviewing a screen against your design standards, building from a product development roadmap (PRD), checking product copy, or generating a specific kind of interface. Instead of rewriting the same long series of prompts every time, you can turn that process into a skill and invoke it when you need it.
4. Be judicious about bringing in outside context
If guidelines.md are where you store standing instructions, MCP connectors are how you fetch the outside context a task depends on.
Connectors are most useful when Make needs access to something beyond the project itself: a live spec, a ticket, a design system reference, a technical document, a bug report, a workspace in another tool, or a custom internal system. But more context isn’t always better.
Pointing Make at a large external source without specifying the details to pay attention to is one of the easiest ways to make a task harder than it needs to be. A giant Notion page, a broad Jira or Linear query, or an open-ended search across a connector workspace all introduce noise. The model has to figure out not only what to do, but also which context is actually relevant for its task.
Figma Make tip
Used well, external context gives Make better grounding. Used loosely, it just makes its job bigger.
The better approach is to scope retrieval tightly: Point to the exact doc; link the exact ticket; name the specific file, error, or component that matters. If there’s only one paragraph or one set of requirements that Make needs, consider pasting that excerpt directly rather than making it search for the answer.
This is also where file attachments can be helpful. If the work requires a live source, connectors are often the right tool. But if it depends on specific files you already have, attaching those directly inside your prompt is the more efficient move. A research read-out PDF can give Make the findings it needs to work from. A CSV dataset can help Make populate dashboards, tables, or profile screens with real values. A video or media asset can help Make embed real material instead of generating a placeholder.
In each case, the aim is simple: Give Make the original material to make its job as easy as possible. AI skills can help here, too—by giving Make exact steps to follow when it uses a connector, a custom MCP, or a file attachment, you get a more controlled, predictable, and efficient output. The goal isn’t to maximize context; it’s to give Make the right context.
5. Create and scale reusable foundations
The fastest way to build in Make is to avoid rebuilding the same UI from scratch every time. Both Make kits Starting today, Make kits and Make attachments bring context into Figma Make, so prototypes start from real components, data, and constraints.
Build with more context and more control in Figma Make
Think of Make kits as shared system ingredients—they help scale the distribution of things like foundations, tokens, components, and guidelines.md when you are working from 0→1 in Make. For teams with React components available as an npm package, this can be especially powerful: Make kits can bring the components and patterns your development team has in production into your projects, instead of approximating them from scratch.
Figma Make tip
Reuse isn't just about speed—it's also about consistency. Make kits provide reusable ingredients, including npm packages, library styles, tokens, and guidelines. Templates provide reusable starting points.
Templates on the other hand, give your team reusable starting points: product shells, preferred layouts, and even starter prompts. This is especially useful for larger teams scaling Make across varied levels of AI fluency and multiple product areas. Fellow Designer Advocate Laura Fehre’s open source SAP template, for example, contains fixed UI elements (header, navigation) that are shared by all products, alongside strict guidelines to make sure prompts can’t easily change them. It also includes “recipes” that help the template users spin up specific themes and layouts on demand. Those recipes live directly in the template's UI as ready-made, code-based prompts—click to copy, then paste into Make.
That kind of setup does two things at once: It makes the template more immediately useful, and it teaches people how to use it well. The result is less rework, fewer dead ends, and a more reliable path to the prototypes the team actually wants to build.
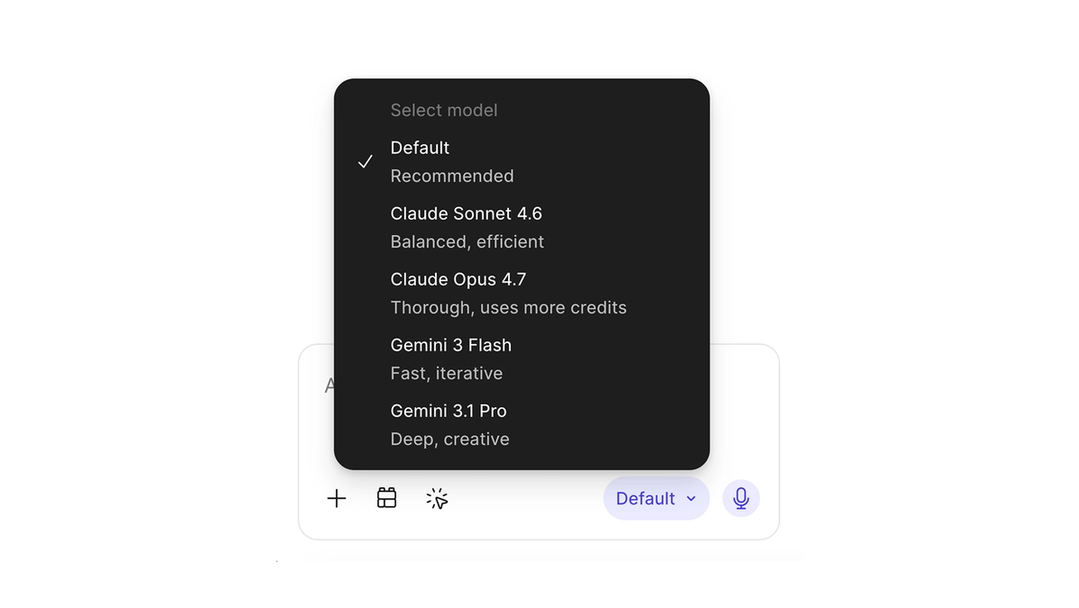
6. Choose the right model for the job
No single AI model is the best fit for every Make workflow. The right choice depends on the job: how complex it is, how much reasoning it requires, how much visual context you’re attaching, and how refined the output needs to be.
A good rule of thumb is to choose the lightest model that can handle the task well.
Figma Make tip
The right AI model depends on the job: Use lighter models for simple iteration, stronger ones for ambiguity, complexity, or high-fidelity work.
If you’re making a small change or doing some routine iteration, a lighter model like Gemini Flash is often the better fit. If the work is more ambiguous, involves tougher debugging, requires stronger reasoning, or needs to preserve a lot of visual fidelity, a stronger model like Claude Opus may get you to a better result faster, albeit at a higher cost. In those cases, investing more upfront can actually be more efficient than spending many rounds correcting a weaker first pass.
This is especially true when you’re starting a new Make file or attaching rich visual context to a prompt. Design mockup attachments can be extremely helpful when you want Make to align to an existing direction. But the more intricate the design file, the more Make has to interpret it. If you’re front-loading Make with a lot of context at once, either use a model that can handle the complexity well, or reduce the context to only what matters for the current step.
It’s worth knowing that long-running Make projects also become heavier over time. As chat history builds up, each new turn gives Make more context to consider, which can compound cost—especially if you’re using more expensive models. When that happens, clearing your chat context can give Make a cleaner slate without forcing you to abandon the project or move everything into a new file.

7. Decide what’s worth automating
Finally, the teams getting the most value from Make aren’t just teaching individuals how to use it better. They’re deciding, together, where it fits in their workflow and where it doesn’t.
Figma Make tip
Efficiency isn't just about how fast you move in Make. It's about knowing which parts of your work are worth moving fast on.
That might mean reserving Make for bringing existing designs to life rather than 0→1 exploration, where ambiguity and iteration can be valuable. It might mean using it to accelerate prototyping, but not to replace manual craft in areas where the team already moves quickly and confidently. It might mean investing in templates, guidelines, and kits because the payoff compounds over time.
Not every task benefits equally from automation. The strongest teams know where Make adds leverage, where human precision still matters most, and where a bit of setup work up front will save a lot of effort later.
The goal isn't to automate everything—it's to make better decisions about what to automate and how. Sometimes the most efficient investment is the one that costs a little more attention up front: a better template, clearer guidelines, cleaner prompts, or a shared team playbook. The payoff is that every project after that starts from a stronger place.
For more guidance on prompt optimization for Figma Make credits visit our help center. If you've found other approaches for working more effectively in Make, we'd love to hear them—share what you're building with us online or in our Figma Forum.
Alexia is a designer advocate at Figma based out of Paris, France. Having worked across the spectrum of design for over 10 years, she is passionate about unlocking creative impact in organizations, building a more inclusive and diverse industry, and crafting magical “a-ha” moments along the way. When she’s not busy hanging out with fellow designers, you may find her traveling to tea fields or reviewing croissants.