

How to build an app with AI in 7 simple steps
Discover how to build an app with AI in this 7-step guide. Prototype and build apps in minutes, no coding required.
Skip to main content
Team productivity


According to Figma’s 2025 AI report, 23% of designers and developers say most of their work is now on AI-powered products, up from 17% the year before. The pressure to ship AI features is relentless, and moving fast without the right foundations creates technical debt that slows teams down. That’s why knowing how to integrate AI into an app correctly from the start is so important.
This guide walks through a practical framework for integrating AI into an app, from mapping use cases to prototyping, handoff, and phased rollout.
Read on to learn:
Not every AI integration looks the same. These are the four main types worth knowing before you start planning.
Machine learning systems learn from historical data to make predictions or decisions. Common use cases include flagging fraudulent transactions, predicting which users are likely to churn, and surfacing personalized recommendations.
ML is a good fit when you have a well-defined prediction target and enough historical data to train against. If your team is sitting on years of product data and has a specific outcome it wants to predict, it’s worth exploring.
Natural language processing is the branch of AI that understands and generates human language. That usually shows up as intent-aware search, support ticket classification, or AI-generated summaries that surface information.
NLP has become significantly more accessible in recent years. Most teams integrate it via an API, which means you can add sophisticated language understanding to an existing app without a dedicated ML team.
Computer vision interprets and extracts meaning from visual input, like for document scanning, photo-based search, and identity verification. That’s what turns a camera into a functional part of the product experience.
It’s particularly relevant for mobile apps, where camera access is native, and users already expect visual interactions. If your app lives on a phone, computer vision is one of the more natural places to start with AI in mobile app development.
Generative AI produces new content from a prompt or context. In practice, that looks like AI coding tools, writing assistants, and automatically generated reports that summarize data.
For most teams, integrating generative AI through an API is the fastest path from idea to shipped feature. You don’t need to train a model from scratch or maintain your own infrastructure. You connect to an existing model, define how your app interacts with it, and build from there.
There’s no shortage of ways to incorporate AI into an app, but the teams that do it well tend to follow a similar pattern. The steps below walk through a practical framework, from identifying the right use cases to shipping and monitoring in production.
Start by auditing your existing product for high-friction, high-frequency tasks. The best candidates are repetitive, data-rich, and currently handled manually or by rule-based logic. Think support ticket routing, fraud scoring, or surfacing personalized content.
Before committing to a use case, make sure the problem is worth solving and that AI is genuinely the right tool for it. Integrations built around business pressure rather than real user need tend to underdeliver. If you’re exploring AI for product design more broadly, start by looking at where users drop off or where support volume is highest.
Without a baseline, there’s no way to know whether the feature worked or to make a case for the next one. This is especially true for AI features, where outputs are harder to evaluate than a standard shipped feature or resolved bug.
Task completion rate, latency, error rate, and adoption are all metrics worth tracking. Pair those with a business outcome, such as retention, support deflection, or revenue impact. Watch out for metrics that look good but don’t tell you much. High engagement means little if users keep coming back because the feature keeps getting things wrong.

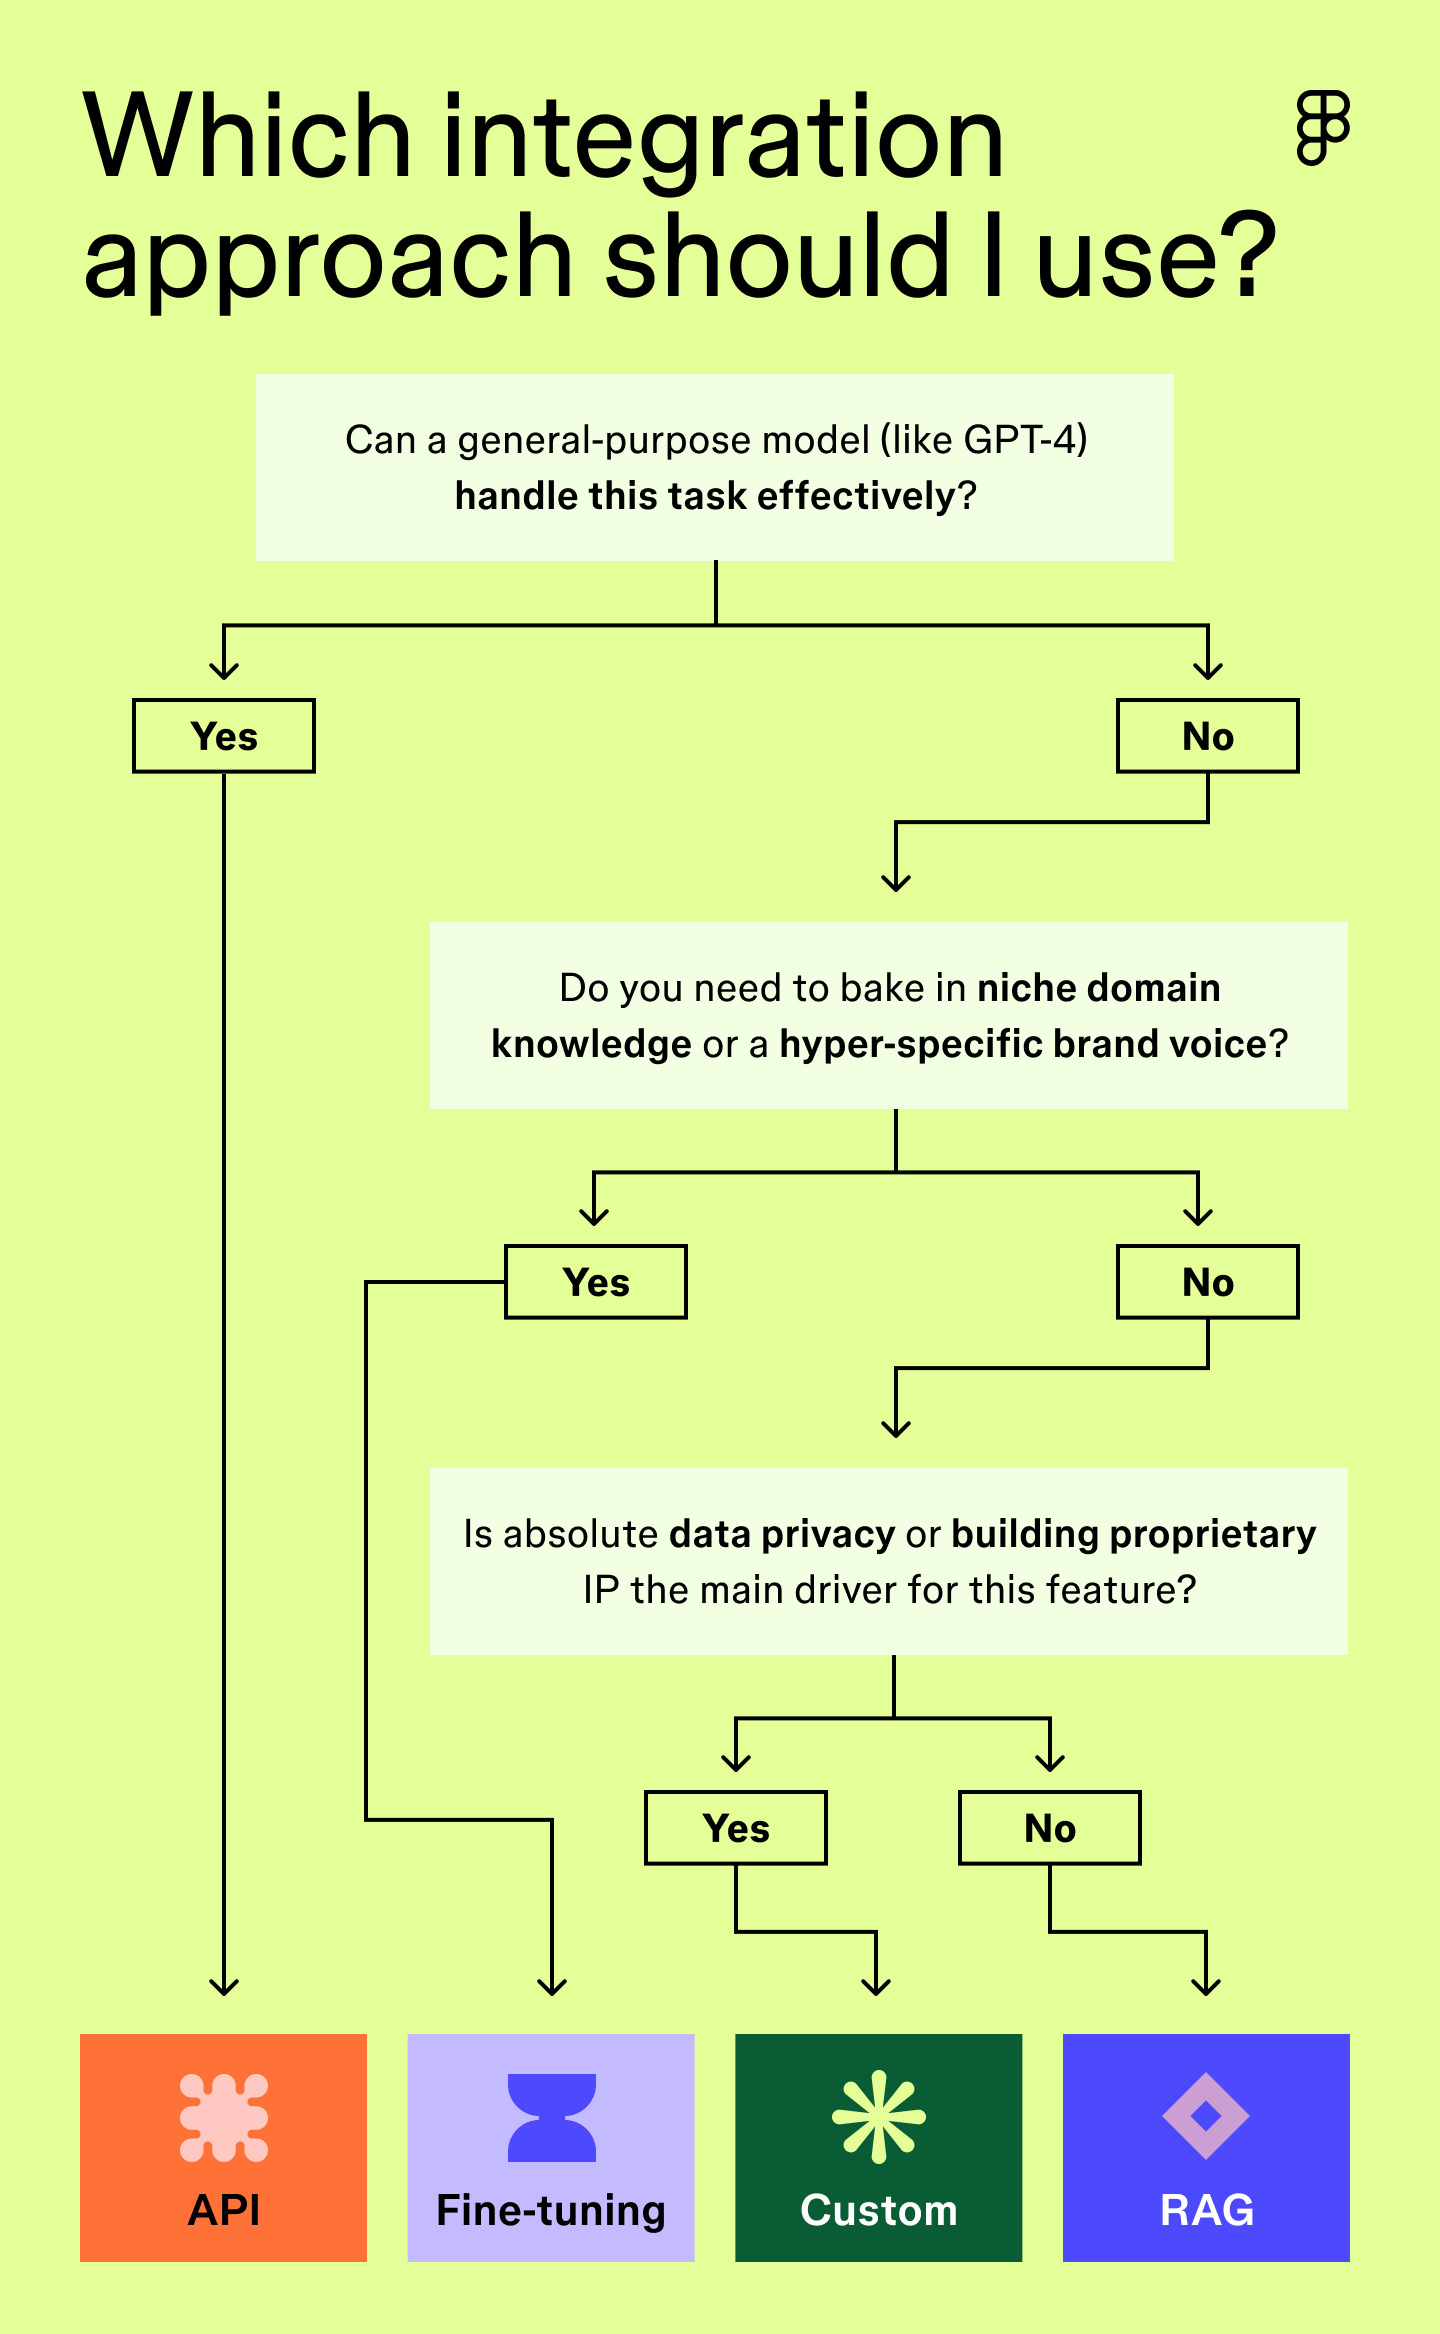
Most teams have three paths to choose from when integrating AI into an app. The right one depends on how much control you need, your data situation, and how much engineering lift your team can take on.
The default choice for most teams should be API-first. Fine-tuning and custom models add significant complexity—only worth it when there’s a clear reason the API path won’t work.
Data quality is where most integrations stall, and it’s often the last thing teams think about until it’s too late. Before committing to a use case, audit what data you have and whether it’s in good enough shape to be useful. Gaps that seem minor during sprint planning tend to surface mid-build when the cost of fixing them is much higher.
Preparation involves sourcing the right data, cleaning it for inconsistencies, structuring it in a way the model can work with, and building reliable pipelines to keep it flowing. It’s also worth understanding what privacy and compliance regulations apply to your use case before you build. Retrofitting compliance is significantly harder than designing it in from the start.

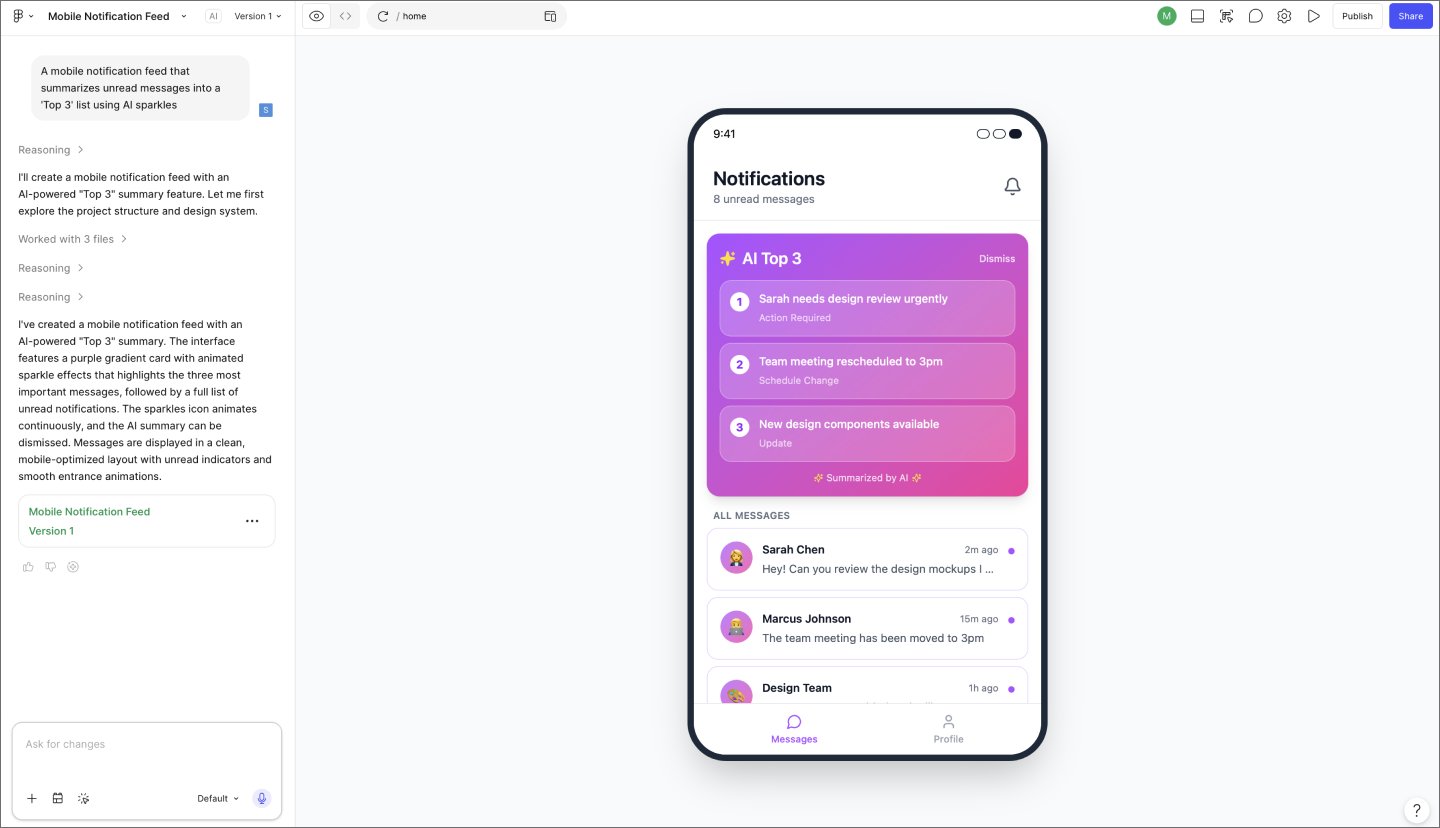
AI features rarely behave in production the way they looked on paper. Building a functional prototype before full implementation is the most reliable way to catch those surprises early, before they become bigger problems.
That’s where Figma Make comes in. Design and engineering can co-build a working prototype from prompts, test how the AI feature behaves in context, and align on interaction patterns before the build.
It’s also where teams can work through the UX design decisions unique to AI features: how to communicate uncertainty to users, what a graceful fallback looks like, and how loading states should behave when inference takes longer than expected.

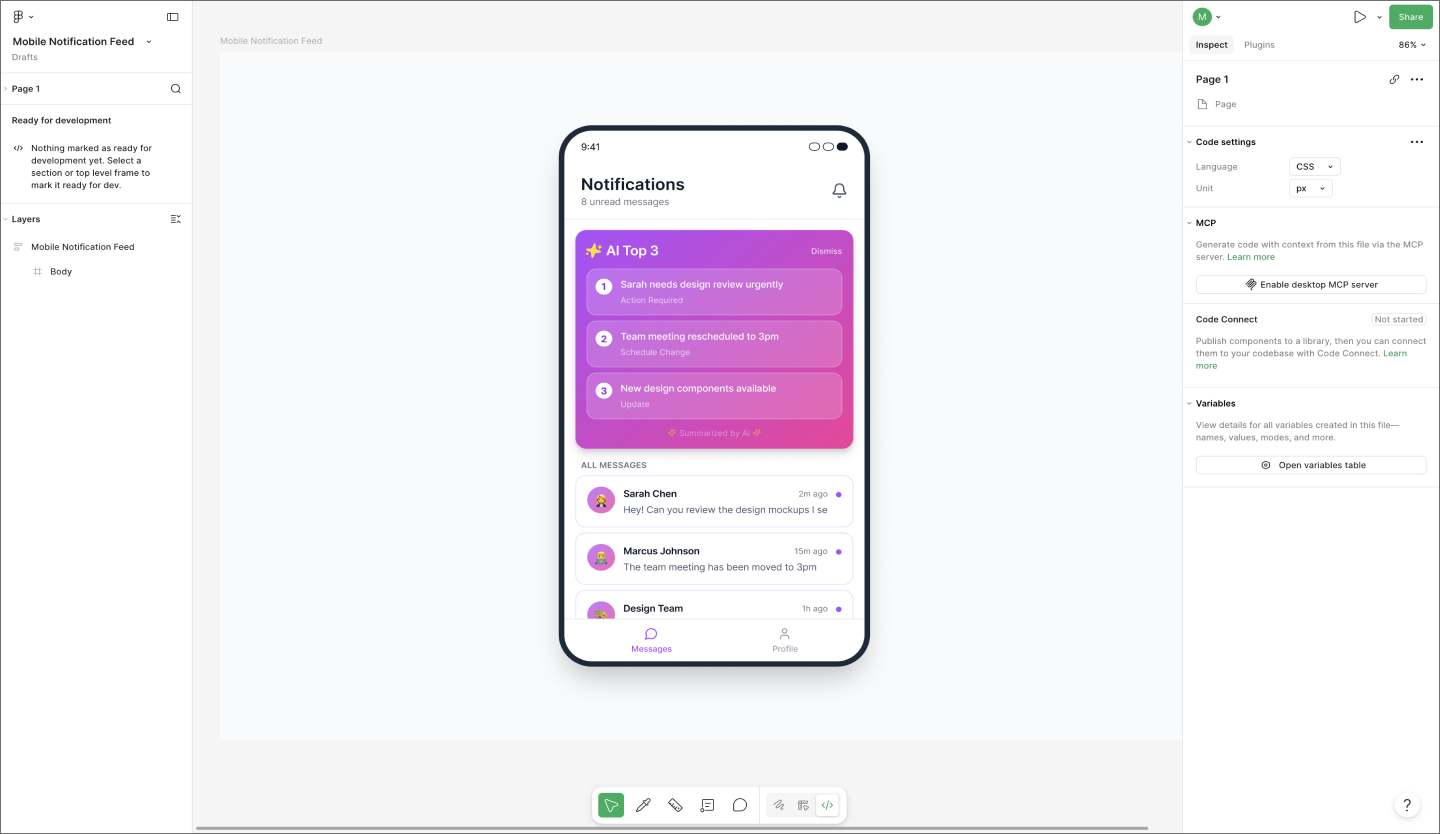
AI features raise the stakes on handoff because the interaction patterns involved are ones most teams are building for the first time. Staying connected to the design source of truth throughout the build keeps those patterns from getting lost in translation.
Dev Mode gives engineers an always-in-sync view of design specs inside Figma, so they can inspect the specs and pull what they need without chasing down the latest file. Code Connect maps those specs to the team’s existing component library, so engineers see their own production code rather than auto-generated snippets when inspecting components.
The Figma MCP server brings design context into the development environment that engineers are already working in. Engineers get Figma context surfaced where they’re building, keeping the loop tight from design through to production code.
Dev Mode gives engineers a direct line from design specs to production code.
A phased rollout gives your team room to catch issues before they affect your full user base. Start with an internal prototype, validate behavior with a small group, then expand to a limited rollout before going broad. Each stage is a chance to pressure-test assumptions before the stakes get higher.
Once the feature is live, keep a close eye on model accuracy, error rates, API costs, and latency alongside the business metrics you defined in Step 2. Model outputs can degrade as user behavior shifts or data distributions change. Catching that drift early is much easier than diagnosing it after users notice.
AI features need ongoing attention in a way that most shipped features don’t. Building maintenance into your product roadmap from the start keeps a solid integration performing the way it should over time.
Every AI integration hits friction at some point. Here are some common AI integration challenges teams run into, and how to handle them before they derail the build.
It’s tempting to treat AI like a simple plug-and-play feature, but the logic can get complicated fast. Between unpredictable responses and sudden lags, what looks like a quick integration can turn into a much bigger lift.
Solution: Prototype in Figma Make before engineering picks it up, and define API contracts early. Teams new to building apps with AI often find the scoping process alone surfaces assumptions worth pressure-testing before the sprint starts.
It’s frustrating to design a personalized experience only to find out the necessary user info is siloed or missing entirely. These gaps usually don’t surface until you’re mid-build, which can force a pivot just when you’re ready to ship.
Solution: Run a thorough data audit before committing to a use case. If the data isn’t there or isn’t clean enough, that’s a signal to revisit the use case.
AI experiences are dynamic. When designers and engineers work in silos, how the AI should behave often gets lost, and the final build ends up disconnected from the original vision.
Solution: Involve design from the start and use shared prototypes as the alignment artifact. Interactive flows clarify design-to-engineering handoffs by visualizing logic alongside layout.
AI often does its best work behind the scenes, which can make its biggest wins feel a bit invisible. Tracking the value of a feature is much easier when you can point to tangible changes in how users interact with your app.
Solution: Return to the metrics you defined in Step 2 and build instrumentation into the feature at launch. Understanding where AI fits into your product development process makes it easier to track outcomes.
AI integration timelines vary widely depending on the approach. An API-based integration can go from prototype to production in a few weeks, while fine-tuned or custom models can take several months once you factor in data preparation and testing. The biggest variable is usually data readiness. Teams that have already audited their data move faster than those that discover gaps mid-build.
Yes, you can integrate AI into an existing app without rebuilding it. The most common approach is connecting to an AI model through an API, which lets you add capabilities like natural language processing or personalized recommendations without touching your core architecture. That said, a thorough data audit upfront helps surface any infrastructure gaps before they slow down the build.
The data you need depends on the type of AI you’re integrating. Machine learning models require historical data relevant to the prediction you're trying to make, while generative AI via API requires much less. Across all approaches, the fundamentals stay the same: your data should be clean, structured, and compliant with any relevant privacy regulations before you build.
An AI API connects your app to a pre-trained model so you can add AI capabilities without managing infrastructure or training data. Building a custom model means training from scratch on your own data, which gives you more control over performance but requires significantly more expertise and resources. For most teams, an API is the right starting point.
Start with the metrics you defined before the build: task completion rate, error rate, latency, and adoption. Pair those with a business outcome, such as retention or support deflection. If those numbers look healthy but users are still struggling, dig into qualitative signals too. Running AI usability testing earlier in the process can help you catch qualitative gaps before they compound in production.
Knowing how to integrate AI into an app is a good start, but it’s important to implement a process that keeps your team aligned from use-case mapping through production rollout. The steps in this guide give you a repeatable framework for doing it right, without the rework. When you’re ready to get started, we hope you’ll consider Figma for all your design and development needs.
Here’s how to get started:
Figma Make lets you quickly go from prompt to working prototype.
Discover how to build an app with AI in this 7-step guide. Prototype and build apps in minutes, no coding required.


Build a powerful AI product design stack with these 5 specialized tools. Unify your workflow, from concept art to code, for maximum speed and efficiency.


UI design starts with a clear understanding of best practices. Learn the seven essential UI design principles and how to apply them in this guide.


Create interactive apps faster with some of the best AI app builders for 2026. Build no-code or low-code apps with Figma Make and other AI-powered platforms.


Building an app requires research and constant iteration to meet customer needs. Learn how to design an app effectively and how Figma can help in this guide.


Explore Web development trends defining 2026. Learn how AI-driven workflows, server-first performance, and new browser standards are reshaping how teams build.